Realistic Water Shader (Shader Graph)
Made with Unity
—A futher exploration of my stylized water shader.
Intro
In the stylized water shader that I made, I tried my best to “tune” the color of the water. Although I did add directional light in the scene but it doesn’t affect how the water would look at all. Then I thought it would be fun if I made the water reacts to the environmental lighting, in a word, realistic. Well, technically any realistic water shader today is still “stylized” because a physically accurate simulation is extremely complex and expensive, game art is not about replicating the reality, we want things to be artistically controllable and believable.
The key method to create a realistic water shader is to actually let the light bounce on its surface and change the direction of reflection constantly to create the illusion of height difference caused by waves and ripples. In this post I will explain how I used a normal map to perturb the normal vector of the water plane to make it look realistic.
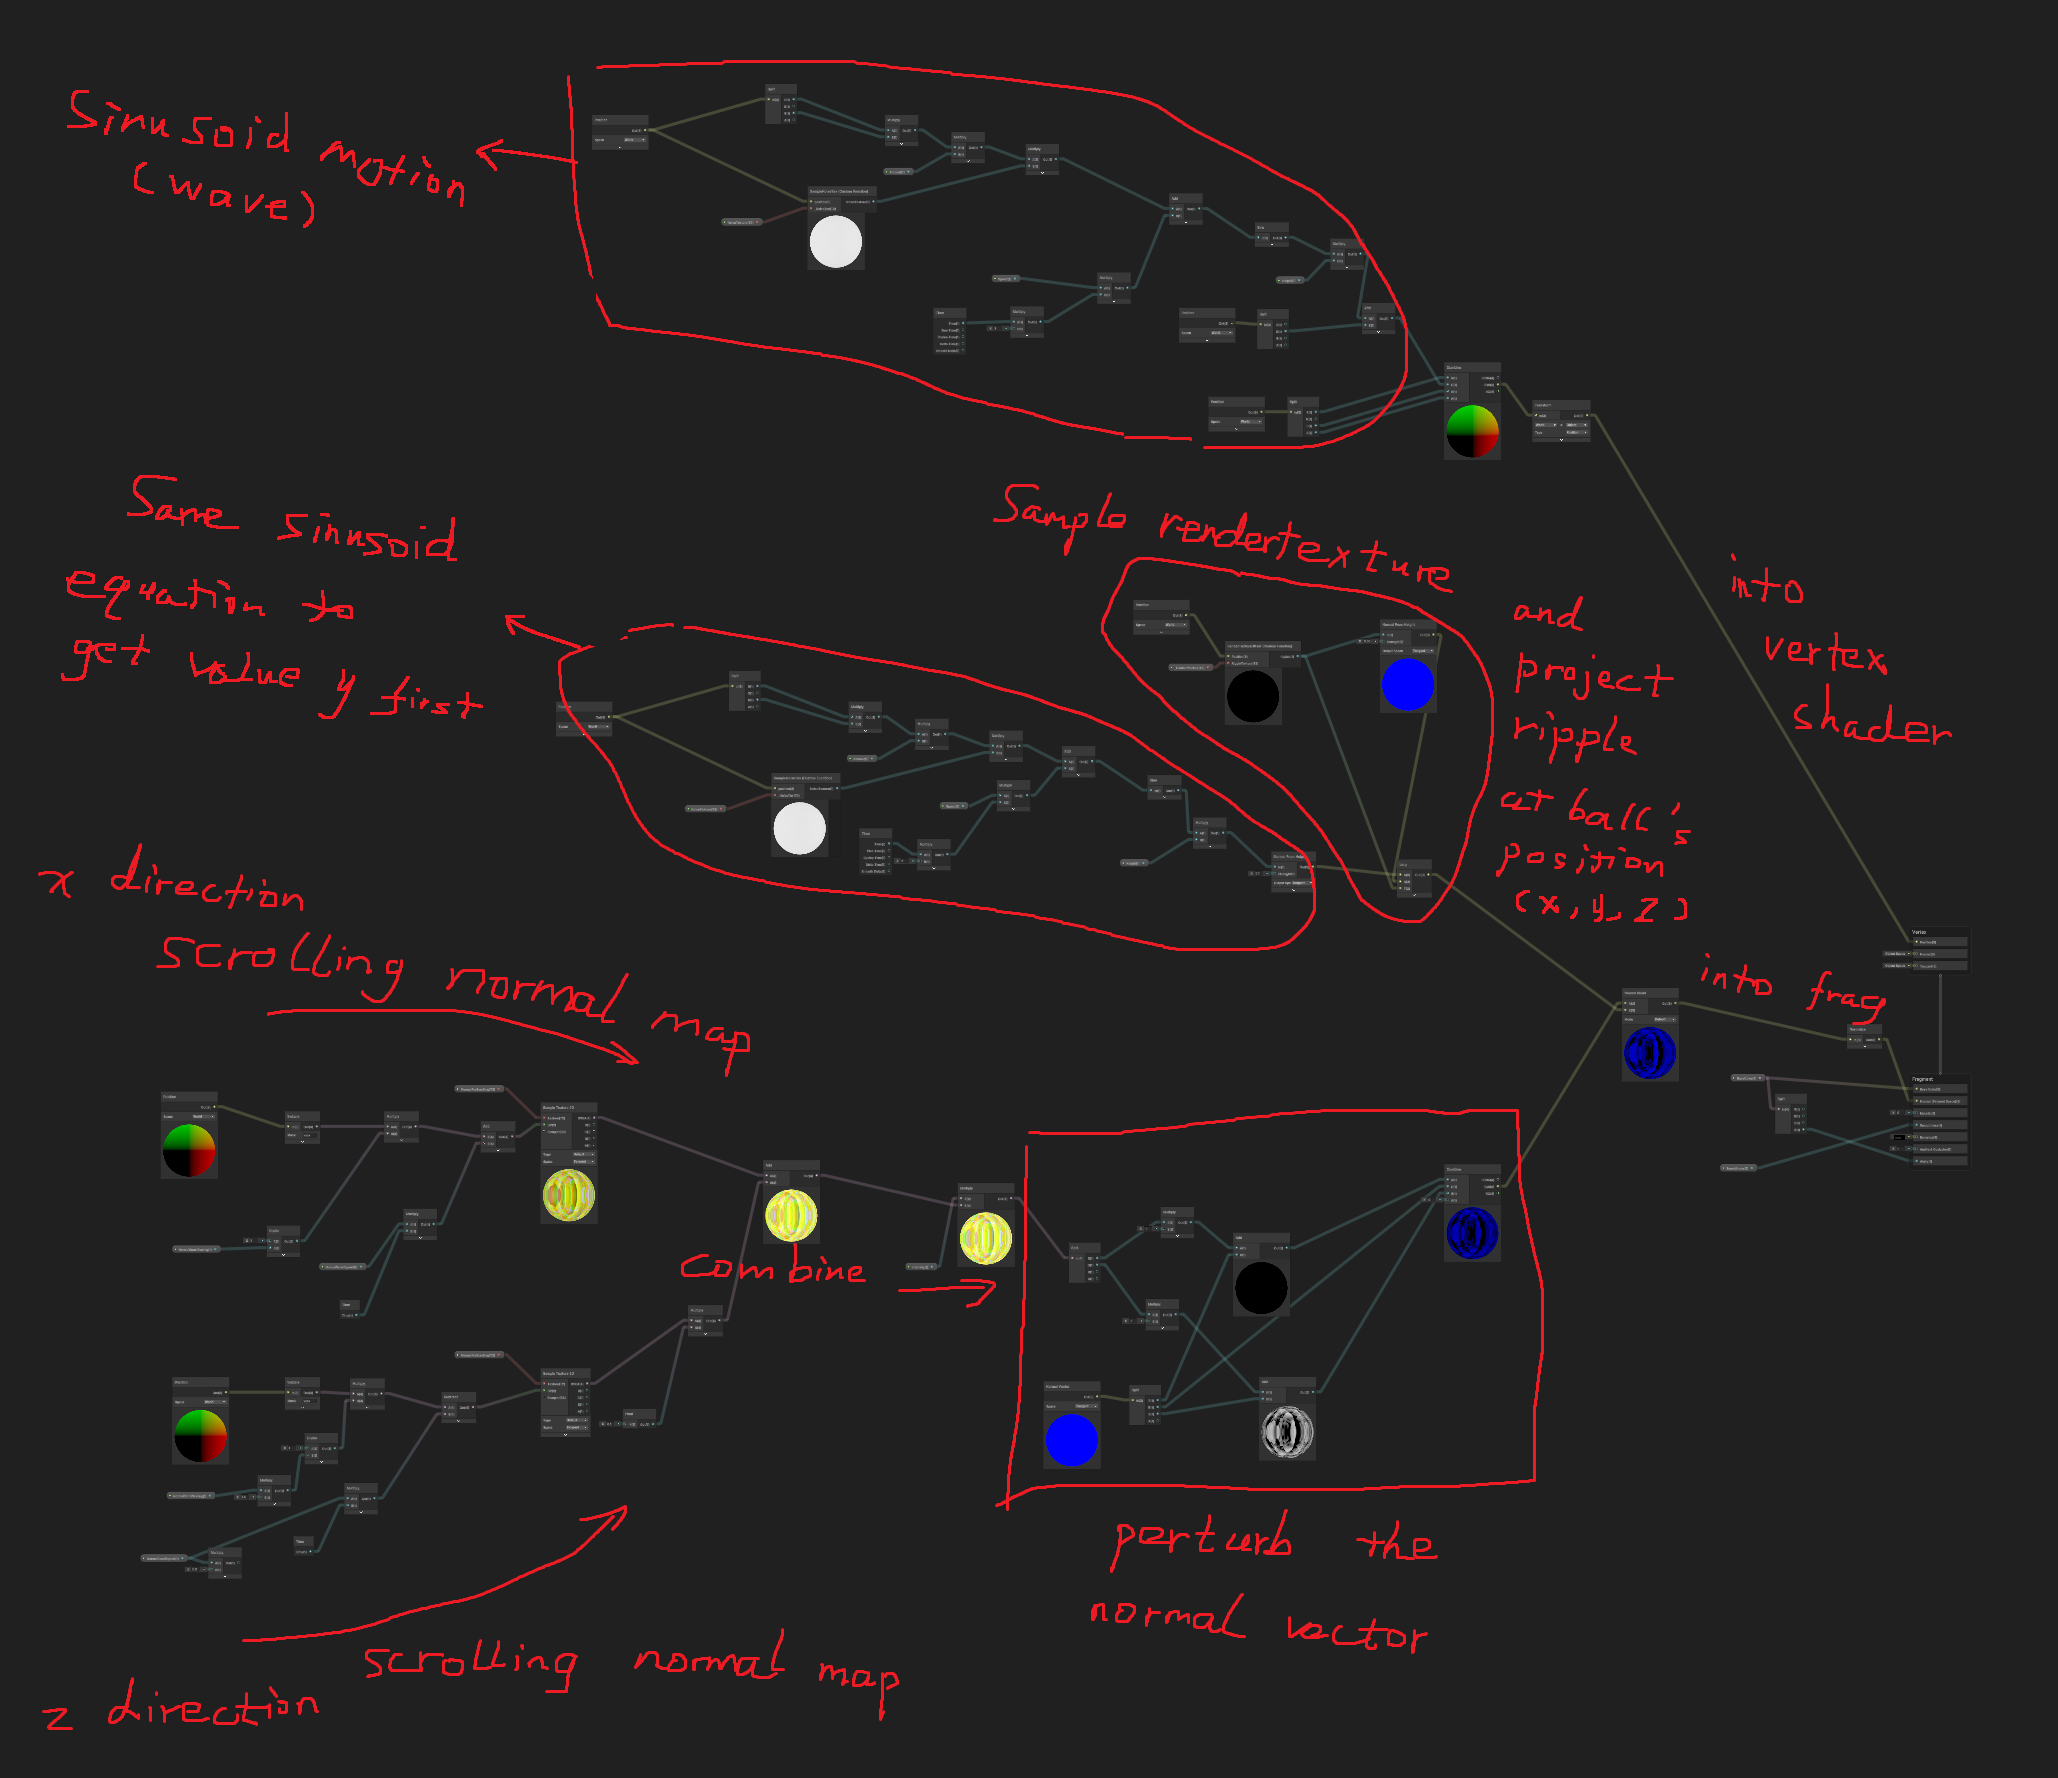
Unlike using a scrolling noise map to distort the water texture like we did in stylized water shader, here using a scrolling normal map changes the normal vector direction in real time. And normal vector is the key factor when the engine calculates the direction of the reflection from lighting.
finalColor = LightColor * max( dot(normal, lightDirection), 0 )
(when the light is behind the object the dot product can be negetive which doesn’t make sense physically, therefore clamp it to greater than 0)
We want the surface to have bumps, grooves, scratches, wrinkles — without modeling millions of polygons. And a scrolling normal map can create this effect, but it still looks monotonous, not convincing enough. So the move here is to apply the scrolling normal map from two different directions - x and z.
See the return normal gif.

Normal Map found in Unity BoatAttack demo. ↑
←Scrolling Normal maps on two directions.(shader graph)

The rest is simple, send the new normal vector to the fragment shader after normalizing it.
But I did want to make the ripple realistic as well instead of a white foam no matter what the lighting is.
Therefore we should take the ripple into the normal calculation.

The same wave equation with the same noise map sampling to get the vert’s position. But what we need is not the position itself, we need the new normal at the postion. Therefore we connect the result into the node Normal From Height.
“Normal From Height” node is useful when we only have a height map where bright means “higher” and dark means “lower”. Normal From Height calculates the normal of that vert by looking at the height difference of the adjacent vert’s positions.

Next up we sample the render texture and connect it into a custom node called RenderTextureOffset where I “attach” the render texture to the ball’s position creating the ripple. The code inside of the custom node is also from the stylized water shader.


Then the lerp node(Linear Interpolation), basically blend A channel and B channel depending on T channel.
Lerp(A, B, T) = A * (1 - T) + B * T
T = the blend amount.
T = 0 → output = A
T = 1 → output = B
T = 0.5 → output = halfway between A and B
T > 1 → overshoots past B
T < 0 → overshoots past A

The render texture looks something like this, white and black. So the lerp node basically means when it’s white, output the normal of a higher position. If black, then just the water’s original normal. Reason why I used lerp to only output the ripple normal instead of combine the ripples noraml and water vert’s normal is that the result of the latter looked quite messy as the ripples are uneven.
And that’s it, all that’s left to do is comine the ripple normal and the water plane’s normal, normalize, and then connect into the fragment shader.
The Ripple height map is different from the stylized one as shown below. The Black is not color, it’s transparent so that the “height” of the white ring is higher creating a ripple.